


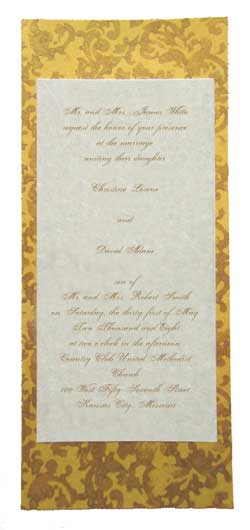
Golden Custom Wedding Invitation
These simple golden wedding invitations were followed a simple two layered invitation design. Christy used gold cardstock that she purchase in bulk to keep the costs down and created a pattern with gold ink and a large rubber stamp with a damask pattern design. Rubber stamping on invitations would have to be the cheapest and effective way to create a patterned background with texture. You can dress up cheap, plain card stock with a well chosen stamp.
Use this easy to follow invitation tutorial that Christy has written for Make-your-own-invitations.com. She has included a couple of her tips to help you make your own custom wedding invitations.
 Materials
to make gold invitation
Materials
to make gold invitation
- Colored Cardstock
- Parchment Cardstock
- Envelope
- Large Stamp
- Ink Pot
- Blotting Cloth
- Surface Protector (such as a painting drop cloth)
- Adhesive Squares
-
We ordered bulk cardstock and envelopes (we ordered ours from www.actionevelope.com) – MONEY SAVER: if you’re going to be making a lot of invitations (we made 250), bulk is the way to go!
-
Cut the colored cardstock to the necessary dimensions - these will change depending on the size of envelope you choose. I suggest cutting one to make sure it fits in the envelope first!
-
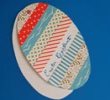
Choose your stamp keeping in mind the size of invitation you plan to use – we chose a large tapestry background print because of its ability to cover a lot of area and be continued/repeated seamlessly.
-
Grab your ink and find a shallow dish (a plastic disposable dessert plate would work well) and make sure the pigment is well-mixed.
-
Make sure you have your surface protector down!
-
Pour a small amount of ink into the dish and dip your stamp into it - before you lay it down, you should check and blot if there’s too much ink.
-
Lay the stamp down – you’ll more than likely have to stamp each invitation two or three times.
-
Design your wording – you can download hundreds of fonts at www.dafont.com (we decided on the Porcelain font: http://www.dafont.com/porcelain.font)
-
Print the wording on the parchment – make sure that you size the parchment so that there will be a color border after you place the parchment cardstock on top of the colored cardstock.
-
Cut the parchment cardstock to desired size – again, I would suggest doing yet another trial run before cutting.
-
After you’ve made sure that the inked cardstock pieces are dry, secure the printed parchment pieces onto the colored cardstock pieces using an adhesive square on each corner of the parchment cardstock.
Christy S.
Kansas City, Missouri