
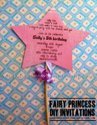


How To Washi Tape Birthday Invitations

DIY Washi Tape Birthday Invitations
Here is a tutorial to show you how you can make Washi tape birthday invitations. They are super easy to make and all you need is some card, washi tape, a pencil and a permanent black marker with a thin tip like an Art pen.
Washi tape, as we have shown before is great for parties and celebrations. You can pick out a few roles of tape to match your parties color scheme. You can use Washi tape to decorate your tables, cutlery, serviettes, stationery and as you can see, your party invitations. We got our Washi Tape from our fave online supplier Washi Lane Tape.

Supplies to make this Washi Tape birthday invitation
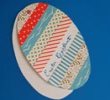
We used a party banner design to embellish our invitation. Each of the banner flags are cut from patterned washi tape.
- Basic white card.
- Washi tape in 3 different patterns.
- Art pen with a fine tip - I used an Artline 0.4 - any permanent fine tip pen will suffice.
- Pencil and eraser.
- Craft knife or pvair of scissors.
- Craft mat (optional)
Step one
First of all cut your card down to size.
For this invitation I used an A4 sheet of White cardstock and cut it into quarters so that I had 4 A6 sized cards (approx 4x6")
Step two
With a pencil sketch out the line of the pennant banner. When you are happy with your line then go over it with the art pen. I like to mark out my outlines twice to create a slightly darker and thicker line.
Let the ink dry for a few minutes then rub out your pencil lines with the eraser.
Step three
Cut out 6 or so flags from the Washi tape. This can get a little fiddly so you will need a sharp pair of scissors. You can also stick the tape to a cutting mat, then cut the flags out with a craft knife.
Stick the flags to the front of your invitation, spacing them out evenly. Washi tape easily peels off and can be stuck down again.
Take your art pen and outline the inner edges of each flag. Be sure not to accidently touch the already inked areas before the ink has had time to dry to avoid any smudges.
Step four
Take your pencil again and lightly add your invitation wording. Dont forget the who, what, where, when and rsvp details.
Leave a bigger space where we will stick another piece of tape with 'Andy's 5th Birthday' written on it with the fine tipped permanent marker.
Once again when your are satisfied with your wording placement you can go over your wording with the ink pen. Erase your pencil marks after the ink has dried.
Step five
Create a border for your invitation. We drew a simple black line around the edges for a easy border.
- Easter party invitations
- DIY Birthday invitations