

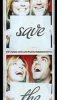
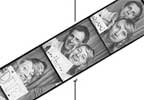
Save The Date Photo Booth cards
 Reproducing the Photo booth look for
Save The Date cards are super popular with
couples who want to take their wedding stationary to the next level. They are
a fun and flirty way to let your family and friends know of your upcoming
wedding and they are just so darn cute to look at.
Reproducing the Photo booth look for
Save The Date cards are super popular with
couples who want to take their wedding stationary to the next level. They are
a fun and flirty way to let your family and friends know of your upcoming
wedding and they are just so darn cute to look at.
You may be surprised to learn that they are pretty easy to make yourself even if you don't have access to a real live photo booth. In fact it is probably better to use a regular camera with a plain background like a wall so that you can take as many shots as you need to get the perfect pictures.
Basic steps to making a save the date
- Choose your Save the date wording and prepare your props and
signs
- Get yourself and your fiancé photographed holding your fab homemade signs
- Pick your favorite 3 or 4 photos
- Create a photo strip
- Incorporate the photo booth strip into your save the date design
As you browse through this section you will find several methods that have been used to design save the dates so I'm sure that you will find one to suit your style, resources and wedding budget.
Photobooth save the date examples and templates
|
|
|
|
|
Photobooth Save Date Gallery |


Kristy-Lee's Photo booth Save the dates
This method requires you to head down to your local photo booth for some pictures and then scan, print and cut your cards
You will need
-
Access to a photo booth
-
Adobe Photoshop or similar program + some basic skill is a little Photoshop knowledge to make this happen.
-
Scanner
-
4 pieces of plain white card stock or paper 8.5 x11 / US letter / A4
-
Black or colored markers
-
Photo paper or white cardstock
-
Paper trimmer or a metal ruler and craft knife
 Step
one - Write your signs
Step
one - Write your signs
Fortunately the only prop you absolutely need for save the dates are signs for the wording you will use. These are made with a piece of white paper or card with printed or hand written wording.
Take your 8.5x11 sheet of card stock and trim it down a little to about 7x11.5 so that it will fit within the photo frame a little better. If you can't find any card then you can use plain copy paper, it will be a little flimsy but it will still work ok.
Write your wording on to each sign with your marker. Try to write thick bold letters that will be more readable. Alternatively you can open up a word processing program on your computer, type in your text and print it for a neater result. Personally I prefer the hand written signs as they have more character.
Alternative Signage ideas
-
Cardboard speech bubbles
-
Chalk board
-
Sketch a doodle thingi
-
Baby alphabet blocks
-
Cut out printed letters
-
License plate - will need to apply post processing photo editing techniques to add the wording
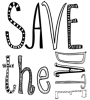
Wording Ideas
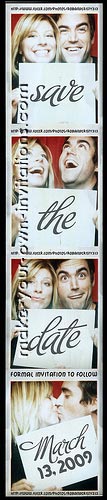
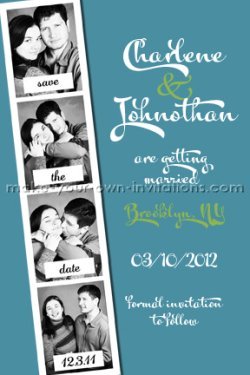
There are usually 4 photos in a photobooth strip so you will have four opportunities to communicate your STD information. The general format is to have one word for each picture ie 'Save' 'The' 'Date' and the date of the wedding for the last photo. You can substitute the wording on the last sign for something a little more informative like.
Marsha & Stewart
are getting hitched
02/02/2011
Pittsburgh, PA
formal invitation to follow
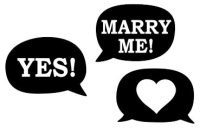
Alternative wording options include:
-
He Asked... She said YES, Save the Date, Wedding Date
-
Marry Me, Yes, Please Save the date, Wedding Date
Printable Photobooth Signs
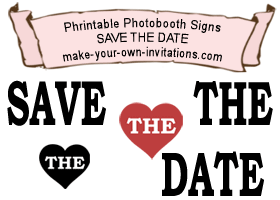
We've made a couple of free printable photobooth sign sets that you can download and print for free.
Step Two - Head on down to a photobooth
With your signs in hand, find your closest photobooth. Get your smiles and funny faces ready and start taking your pictures. Don't hold back on the crazy poses. It might pay to practice what poses you're going to go with before you get there to save yourself a few dollars.
Step Three - Create a printable file
Scan your Photobooth strips and insert the resulting image into a Word document. You should be able to fit in 4 or 5 photo stips on to one lansdscape sheet.
Print them off on to Photo paper for an authentic photograph feel. Cut the cards to size.
Post them off to your friends and family as they are or stick
them to a card with double sided tape.
Made by Kristy-Lee Lawley
Orlando, FL, USA.
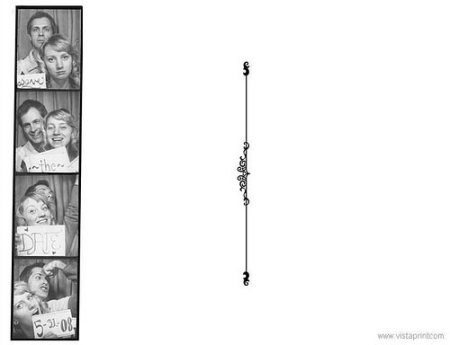
Postcard STD's
These creative Save The Date postcards were made by Megan. She and hubby to be used the fake a photobooth method with a digital camera in their own home to create the photo strips.
They then used Vistaprint.com to print them really cheap in a postcard format (Check out some their postcard specials and how you can print 100 cards for $2)
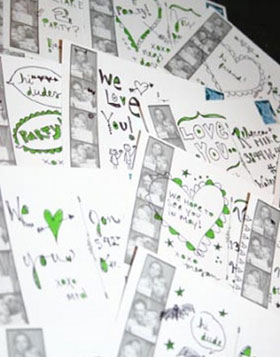
The picture below is the back of the postcard with the photostrip to the left and space for the recipients address and postage stamp on the right. Megan filled in the rest of the white space with handwritten doodles and comments.
Back of postcard
Front of Postcard
The back before posting
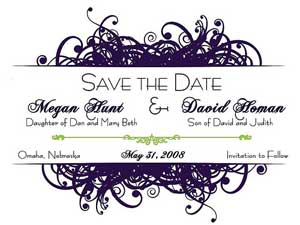
Megan also created her own very unique wedding invitations.
Megan Hunt
Omaha, NE, USA
Our Customized photo booth cards
If you really want a photo booth themed Save the date but you don't have the resources to make your own cards then why not order one of our Customized photobooth save the date card designs.
We offer printable Save the Dates that you can print off at home on your home printer. Alternatively you can have them printed at your local photolab for around 10 cents per photo card. That equates to 100 cards for only $10.00. You can easily stick a magnetic strip to the back to turn your cards into fridge magnets.
If you only want the photo strip itself then we can do that for you too. Be sure to let us know that is all you want and we will make a 1.5" x 7" booth strip. We'll also put 3 strips on to a 5"x7" .jpeg file so you can pint it at a photolab and save even more.
You will be required to send us 3 to 4 photos and your preferred wording and we will do the rest...
Order a customized photobooth Save the date card or order the photostrip only.

Return from Save the Date Photo Booth Pictures to see more save the date cards